San JoseHardscapes
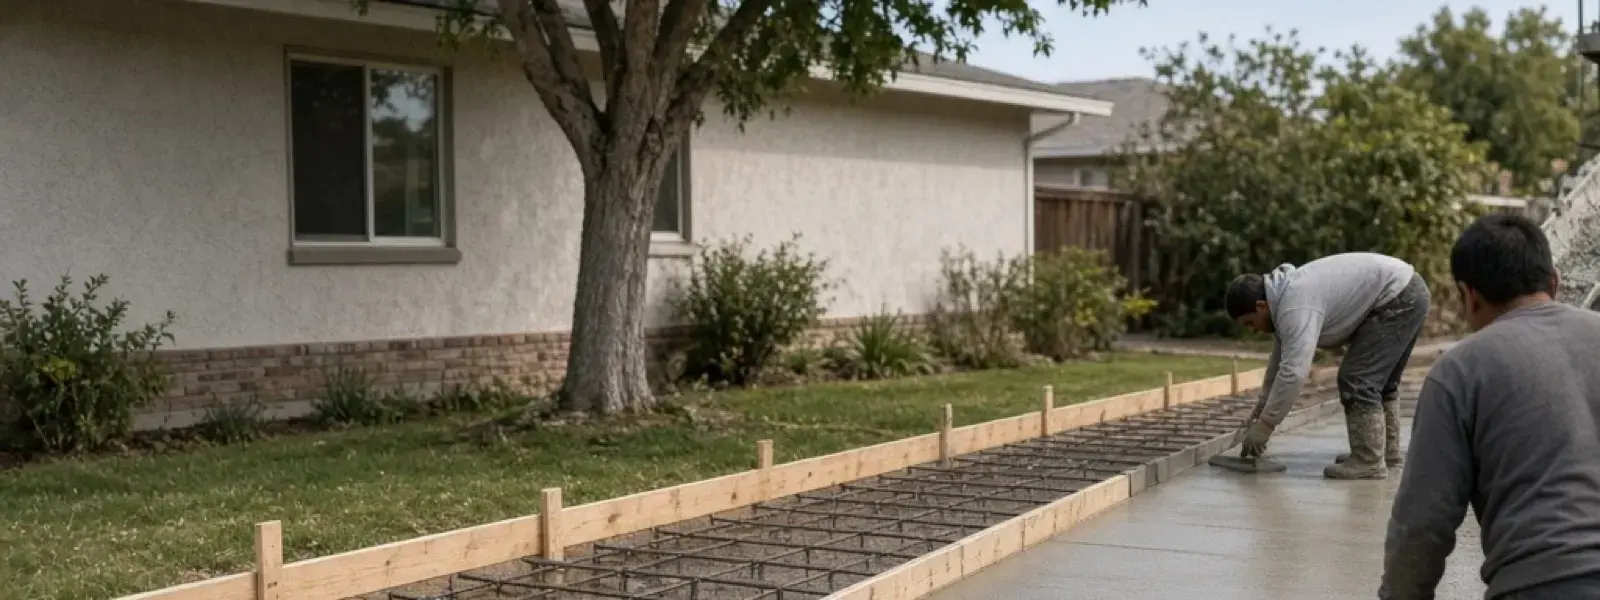
Concrete crew finishing a reinforced driveway pour with form boards and a mixer truck in San Jose

Hardscaping Services

Concrete Driveway Installation in San Jose, CA

Forms, rebar on chairs, a real mix design, and joints placed before the slab picks its own.

The short answer

A concrete driveway in San Jose is a 4 to 6 inch slab poured over a compacted 4 inch aggregate base, reinforced with rebar or fiber, jointed every 8 to 15 feet depending on thickness, and cured properly. On the valley's expansive clay, subgrade prep and drainage matter as much as the concrete itself.

Most driveway calls we get start the same way. The old slab has a crack you could lose a quarter in, one corner has dropped toward the street, and the oil stain is older than the kids. San Jose Hardscapes pulls out the old concrete, rebuilds the ground underneath, and pours a new slab sized for what actually drives on it. The concrete is the part you see. The ground is the part that decides whether it stays flat.

Here in the Santa Clara Valley that ground is often adobe clay. It swells when the winter storms soak it and shrinks hard through a dry summer. A slab sitting on untreated clay gets pushed and pulled twice a year, and concrete doesn't flex. So a good driveway job is mostly about controlling moisture, compaction and thickness before a single truck backs in.

This page walks through how we build one: demolition, subgrade, base rock, reinforcement, mix design, joints, finishing, curing and sealing. It also covers the stuff people forget until it bites them, like the apron at the curb, the slope toward the street and the street tree that's been lifting your slab for ten years. If you're weighing concrete against paver driveways, we'll lay out the tradeoffs plainly.

Why people call

Reasons to call about concrete driveway installation

01

Cracks that move or open wider

A hairline shrinkage crack is cosmetic. A crack you can feel with your shoe, with one side sitting higher than the other, means the base has shifted or the slab was too thin. Cracks that keep widening usually point to clay movement or a tree root, and patching them rarely holds.

02

Slabs that tilt or pond water

If water sits near the garage door or runs toward the house, the slope is wrong or a section has settled. Standing water soaks the base, softens the clay and speeds up the damage. We see this a lot on 1950s to 1970s ranch homes where the original driveway was poured flat.

03

A driveway too narrow or too small

Many older valley driveways were poured for one car and a bicycle. Families now park two or three vehicles, and tires end up on the lawn or the planting strip. A new pour is the time to widen, add a turnaround or square up the apron, subject to what the city allows at the curb.

04

Surface scaling, stains and spalling

Flaking surface, pitted concrete and chronic oil staining usually mean a weak mix, too much water at the pour or poor curing. Resurfacing sometimes works for light damage, but when the slab itself is thin or cracked through, replacement is the honest fix.

05

Selling, remodeling or adding a garage conversion

Driveways get replaced before a sale, after an ADU build or when heavy equipment has torn up the old slab. If a remodel changes how cars enter the property, we plan the new slab around the new layout, including drainage and any required permit work.

What's in the job

What the job actually includes

01

Demolition and haul-off

We saw-cut the edges where the old driveway meets the sidewalk, garage slab or walkway so we don't shatter what's staying. Then we break the old slab, pull the rebar or mesh, and haul it all away. Old concrete over 3 inches thick usually needs a breaker or a skid steer with a hydraulic hammer, not just a sledge and good intentions.

02

Subgrade grading and compaction

After demo we cut to depth, usually 8 to 10 inches below final grade for a 4 inch slab on 4 inches of base. We remove soft or organic material, condition the clay to the right moisture and compact it with a plate compactor or roller. Pumping or spongy spots get dug out and replaced, not covered over.

03

Compacted aggregate base

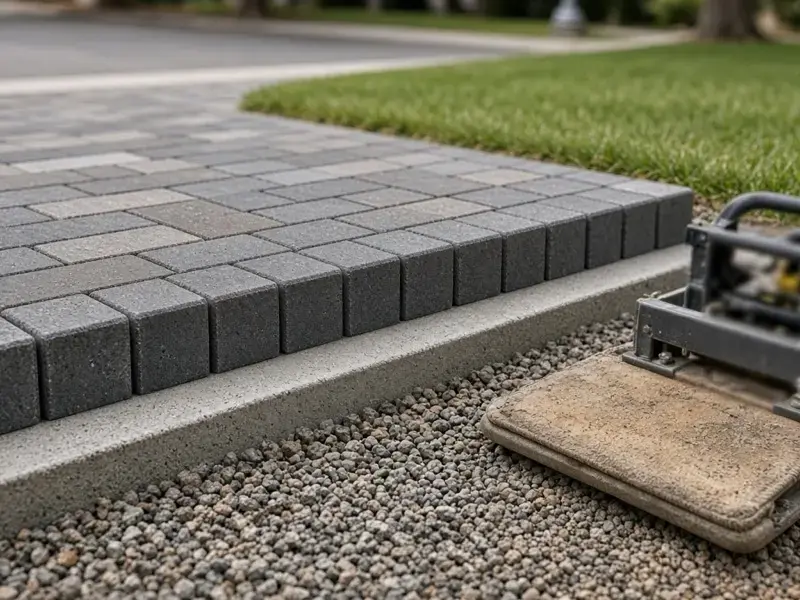
A 4 inch layer of crushed aggregate base goes down in lifts and gets compacted to about 95 percent of Standard Proctor (ASTM D698). It gives the slab uniform support, lets water drain away from the underside and breaks the capillary rise of moisture from wet clay. On soft subgrades we go thicker.

04

Forms, reinforcement and joint layout

We set straight, staked forms to the finished edges and slope, then lay out rebar on chairs, welded wire or a fiber-reinforced mix depending on the job. Joint locations are marked before the pour, not guessed at after. Isolation material goes against the garage slab, house, walls and any adjoining concrete.

05

Ready-mix pour, screed and finish

We order a ready-mix to ASTM C94 with the strength, slump and cement content specified for a driveway. The crew places, screeds, bull floats, edges and finishes it to your chosen texture. Broom, exposed aggregate and salt finishes all need different timing, so the finish is planned with the order.

06

Curing, saw cuts, sealing and cleanup

Control joints get saw-cut once the slab can take it without raveling the edges. Curing compound or wet curing keeps the surface from drying too fast. Forms come off, the edges get backfilled, and we haul away leftovers. A sealer is optional and usually applied after the slab has cured for several weeks.

The build

How we build it, step by step.

  1. 01

    Site walk and layout

    We measure the driveway, check where water goes, note street trees, meter boxes, sprinkler lines and the garage threshold, and mark the old slab for saw cuts. We talk through width, finish, thickness and whether the apron needs work. Anything near the sidewalk or curb gets flagged for a permit check with the city.

  2. 02

    Saw cutting, demolition and removal

    We cut clean lines at every edge that stays, then break up the old slab and load it out. Rebar and mesh come out with it. Root zones, buried irrigation and old utilities get exposed carefully. Dust and debris are controlled so the neighbors aren't dealing with it.

  3. 03

    Subgrade cut, moisture conditioning and compaction

    We excavate to depth, strip any organic soil and proof-roll the subgrade. Expansive clay is conditioned to a moisture content slightly above optimum, the range geotechnical reports on clay soils often call for, then compacted. Soft areas are dug out and replaced with compacted fill or base rock.

  4. 04

    Aggregate base installation

    We spread 4 inches of crushed aggregate base in lifts, wet it to compaction moisture and run the plate compactor or roller until the base is tight and uniform. We check grade with a laser or string line, because every quarter inch of base variation shows up as slab thickness variation.

  5. 05

    Forms, rebar on chairs and isolation joints

    Forms are staked straight and set to a minimum slope of 1/4 inch per foot where drainage requires it. Rebar is tied on chairs so it sits in the middle third of the slab. Isolation joint material goes against fixed objects, and we mark control joint lines for sawing or tooling.

  6. 06

    Placing, screeding, floating and finishing

    The truck delivers, the crew places the concrete and screeds it to grade. We bull float, wait for bleed water to leave, then edge, groove and finish. Broom finishes are pulled across at the right moment. Exposed aggregate gets a surface retarder and a wash. We don't add water on site to make it easier.

  7. 07

    Curing, jointing, stripping and sealing

    We apply curing compound or keep the surface moist, saw-cut the control joints and strip the forms once the edges can take it. We backfill the edges and clean up. Traffic stays off until the slab has gained enough strength, and sealing, if you want it, waits until the concrete has cured for several weeks.

Technical detail

The details that decide how it holds up

Subgrade prep on expansive clay

Clay is the main character in most San Jose driveway stories. Adobe clay swells when it takes on water and shrinks as it dries, and the movement can be measurable over a wet winter and a dry summer. If a slab is poured on dry, cracked clay and the first big storm hits, the soil swells under the slab unevenly. That uneven lift is what shows up as the step in the middle of the driveway.

The fix starts before the base rock goes in. We strip organic topsoil, which compresses over time, and dig out any soft or pumping spots. The clay that stays gets moisture-conditioned, wetted evenly and compacted, because dry clay that's rewetted after the pour is the clay that swells. Some sites with a geotechnical report call for lime treatment or overexcavation and replacement with engineered fill, and when a report exists we follow it.

Then we keep the moisture stable. That means grading so water leaves the slab edges instead of soaking in, keeping irrigation heads from spraying the slab perimeter and using a thickened edge on slabs next to planting beds. None of this stops clay from moving. It narrows how much movement the slab sees, and joints and reinforcement handle the rest.

Base, thickness and reinforcement

A standard residential driveway runs 4 inches thick, and that's fine for passenger cars on good base. We go to 5 inches when trucks, delivery vans or a heavier SUV will be on it regularly, and 6 inches for RVs, trailers, dump trucks or a driveway that doubles as a work pad. An extra inch of concrete costs far less than tearing out a slab. The 4 inch aggregate base underneath is compacted in lifts to about 95 percent of Standard Proctor, which gives the slab even support and stops the clay below from wicking moisture upward.

Reinforcement gets argued about a lot. Rebar, typically #3 on an 18 inch grid or #4 on a wider grid depending on the design, held on chairs in the middle of the slab, controls crack width after cracking begins. Welded wire mesh does the same job in theory, but mesh laid on the ground and pulled up with a hook during the pour often ends up on the bottom, where it does very little. Synthetic fibers in the mix help against plastic shrinkage cracks in the first hours, but they're not a substitute for steel where load or soil movement is a concern.

Reinforcement doesn't prevent cracks. Joints decide where the first cracks happen, and steel holds the faces together once they do. We pick rebar, mesh or fiber based on slab thickness, soil conditions and how the driveway will be used, and we explain why instead of just saying it's the usual.
Mix design, slump and placing

Most driveway mixes are specified around 3,000 to 4,000 psi compressive strength at 28 days, tested to ASTM C140 on cylinders. The bigger number buys you a denser, more abrasion-resistant surface, which is useful for driveways that see turning tires and the occasional dropped jack stand. The strength comes mostly from the water-cement ratio. A ratio near 0.45 to 0.50 gives a durable slab, and every extra gallon added at the truck weakens the surface and raises shrinkage.

Slump is the measure of how workable the concrete is. For a flatwork slab we typically look for about 4 inches, perhaps a little more if the mix has a water reducer. Concrete that arrives too stiff is tempting to wet down on site. We don't, because that extra water bleeds out, weakens the top layer and makes scaling and cracking more likely. A mid-range water reducer can improve workability without adding water.

Placement matters as much as the mix. We keep the pour moving, screed to grade, and give bleed water time to leave before final finishing. Troweling too early traps water under the surface and leads to scaling. In summer heat, wind and 90-degree afternoons dry the surface faster than the inside, so we plan shade, early starts and curing compound for those days. ACI 302 and ACI 308 are the industry references for floor and curing practice.

Control joints, isolation joints and where cracks go

Concrete shrinks as it cures. It will crack. The job of a control joint is to give it a weakened line to crack along, so you see a straight groove instead of a jagged diagonal across the middle. The old rule of thumb for spacing is 2 to 3 times the slab thickness, in feet. A 4 inch slab gets joints every 8 to 12 feet, a 5 inch slab every 10 to 15, and a 6 inch slab every 12 to 18. Panels should be close to square, and a panel longer than about 1.5 times its width invites a crack in the middle.

Joint depth should be at least one quarter of the slab thickness. A 4 inch slab needs a saw cut about 1 inch deep, made as soon as the concrete can take it without chipping at the edges. Wait too long and shrinkage cracks beat the saw. Joints that are too shallow, or cut too late, are the main reason a new slab cracks anyway in a spot nobody planned.

Isolation joints are a different thing. They separate the driveway from things that move differently, like the garage slab, house foundation, adjoining sidewalks, curb returns and fixed posts. Compressible joint filler, usually 1/2 inch thick, lets each element move without breaking its neighbor. Leaving it out is one of the most common reasons a driveway cracks right where it meets the garage.

Finishes, curing and sealing

A broom finish is the standard because it gives wet tire traction and hides trowel marks. Exposed aggregate looks richer, and the stone surface grips well, but it needs a surface retarder, precise timing and a careful wash. A salt finish, made by pressing coarse rock salt into the surface and washing it out, leaves a lightly pitted texture that's simpler to do than exposed aggregate and grips well under foot. Each one is more than a cosmetic choice, because finishing timing changes how the surface behaves.

Curing is where good driveways turn into average ones. Concrete gains strength through hydration, and hydration needs water. In San Jose summers the surface can lose moisture faster than the slab can bleed it up, which causes crazing and weak surface paste. A curing compound sprayed right after finishing, or keeping the slab moist under plastic or with a fine spray, helps the surface hydrate evenly. A typical target is keeping moisture in for about a week.

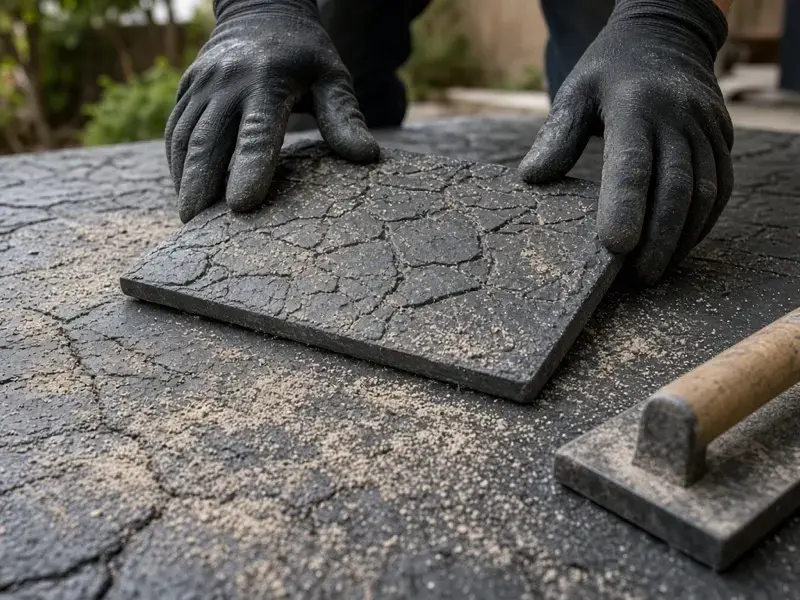
Sealing is optional but useful. A penetrating silane or siloxane sealer repels water and oil without leaving a film, which is why it's popular on broom finishes. Film-forming acrylic sealers deepen color and make exposed aggregate pop, but they wear under tires and need reapplication. Wait until the slab has cured several weeks before sealing, or the sealer can trap moisture and turn cloudy. If you want a patterned driveway instead of a broom finish, take a look at stamped concrete options.

Slope, drainage, tree roots and the apron

A driveway needs to shed water. The usual minimum is 1/4 inch per foot, which works out to 2 percent, and the fall should send water toward the street, a swale or a drain, never toward the garage door or the house. Garage thresholds often have a slight step down to the slab, and that's supposed to be there. If the driveway pitches toward the garage, even a modest storm during the wet season can send water under the door.

Roots are the other silent slab-killer. Mature street trees and large front-yard trees lift slabs as the root diameter grows. Cutting large roots can damage or kill a tree, and some trees on city property are protected. We check what's in the way before we dig, and when roots are a factor we may suggest a root barrier, a thicker section, a shifted joint pattern or a bridged slab design. For trees on public property, check with the city before any roots are cut.

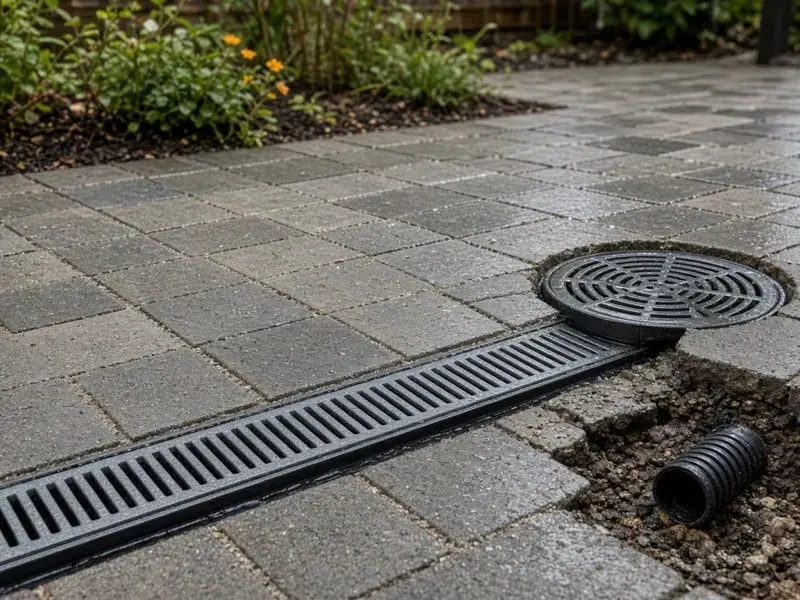
The apron is the section between the sidewalk and the street. It sits in the public right of way, and work there often needs a permit or inspection from the city, depending on where you live. Sidewalk replacement and curb cuts are usually regulated too. We'll tell you what we know and what you should confirm with city public works. Where runoff is a problem, a French drain or a trench drain at the garage threshold is usually a better answer than just re-pouring.

Spec sheet

Concrete Driveway Installation: the numbers

Slab thickness
4 inches typical, 5 inches for heavier vehicles, 6 inches for RVs, trucks or work pads
Base
4 inches of crushed aggregate base, compacted in lifts to about 95 percent of Standard Proctor (ASTM D698), thicker on soft subgrade
Compressive strength
Roughly 3,000 to 4,000 psi at 28 days, tested to ASTM C140, ready-mix per ASTM C94
Water-cement ratio
Around 0.45 to 0.50 or lower, with no water added at the truck
Slump
About 4 inches at placement, adjusted with a water reducer when workability is needed
Reinforcement
#3 or #4 rebar on chairs at mid-depth, or fiber-reinforced mix where design allows
Control joint spacing
2 to 3 times slab thickness in feet, panels near square, cut about 1/4 of the slab depth
Isolation joints
1/2 inch compressible filler at garage slab, house, walls, sidewalks and fixed objects
Slope
1/4 inch per foot minimum (2 percent) toward the street, a swale or a drain
Curing
Curing compound or moist curing for about a week, per ACI 308 practice

Failure modes

How these jobs go wrong

Most failures trace back to a handful of shortcuts. These are the ones we see most.

  • Pouring on dry, uncompacted clay

    Skipping moisture conditioning and compaction is the quickest route to a heaving slab. The clay rewets after the first big storm and pushes up unevenly. The slab might look perfect for a season and then start stepping and cracking.

  • Wire mesh that ends up on the ground

    Mesh that isn't supported on chairs gets stepped on and settles to the bottom of the pour, where it contributes almost nothing. If mesh is used, it has to sit in the middle third of the slab. Rebar on chairs is easier to keep in position.

  • Adding water at the truck

    It makes the concrete easier to push around and makes the finished slab weaker, more porous and more likely to shrink and scale. If the mix needs more workability, a water reducer does the job without hurting strength.

  • Late or shallow control joints

    Joints cut after the slab has already started cracking, or only half an inch deep in a 4 inch slab, let the concrete pick its own crack lines. Cut them on time, at the right depth, in square panels.

  • Skipping isolation joints and ignoring the slope

    Concrete bonded to the garage slab or sidewalk cracks where they meet. And a slab that sheds water the wrong direction soaks the base, softens the clay and floods the garage door. Both mistakes are easy to avoid on the day of the pour and costly to fix later.

Santa Clara Valley ground

What changes for driveways in San Jose and the Santa Clara Valley

The flatland neighborhoods in San Jose and the cities around it sit on a lot of clay. Some areas are alluvial with mixed silt and sand, some are heavy adobe, and the foothills in places like Almaden, Los Gatos and Saratoga bring shallow rock and slopes. Each one changes how we prep the subgrade. On clay we spend more effort on moisture control and thicker base. On slopes we think about drainage routes, retaining the cut and keeping runoff from undermining the slab edge.

Housing stock matters too. Many 1950s to 1970s ranch homes in the valley have driveways poured when a one-car garage was the norm, often thin, unreinforced and cracked by decades of clay movement. Newer townhomes and small-lot subdivisions have shorter driveways and tighter edges, often with HOA rules about finish and color. If you're in an HOA, get the approval in writing before the pour.

Rules and weather round it out. Work in the public right of way often needs a permit, and driveways near creeks such as the Guadalupe River, Coyote Creek or Los Gatos Creek can have extra setback and runoff requirements. We build through the dry season as a matter of course, and in the wet season we pick our days and protect the subgrade, because an atmospheric-river storm can ruin a prepared base overnight. Check with your city about permits for the specific address.

Questions

Concrete Driveway Installation questions, answered

How thick should a concrete driveway be?

Four inches is the usual minimum for passenger vehicles on a well-compacted base. We step up to 5 inches for heavy SUVs, delivery traffic or frequent trucks, and 6 inches for RVs, trailers or anything heavier. The base and the soil matter as much as thickness, so a thicker slab on bad ground doesn't solve the problem.

Should I use rebar, wire mesh or fiber?

Rebar on chairs is our usual choice on clay. It holds cracks tight and stays where it's supposed to be. Mesh works only if it's lifted into the middle of the slab, which often doesn't happen. Fiber helps control early shrinkage cracks but doesn't replace steel where soil movement or heavy loads are a concern.

What strength of concrete do you use for driveways?

Typically a mix in the range of 3,000 to 4,000 psi at 28 days, ordered from a ready-mix plant to ASTM C94. A lower water-cement ratio matters more than the headline number. We don't add water on site, because it weakens the surface and increases shrinkage.

How far apart should control joints be?

A common rule is 2 to 3 times the slab thickness in feet. For a 4 inch slab that's roughly 8 to 12 feet. Panels should be as close to square as possible, and the saw cut should be about a quarter of the slab depth, cut as soon as the concrete can be sawn without damage.

Can I drive on it right after the pour?

Not for a while. Concrete needs time to gain strength, and heavy trucks or turning tires too early can damage the surface and edges. We tell you when it's safe to walk, park a car and take heavier vehicles. Keeping sprinklers off the fresh slab also helps.

Do I need a permit to replace a driveway or the apron?

Often work in the public right of way, such as the apron, curb cut or sidewalk, needs a permit or inspection from the city. A like-for-like replacement entirely on your property is often treated differently. Rules vary by city and sometimes by address, so check with your local public works or building department.

What finish holds up best: broom, exposed aggregate or salt?

Broom is the most common and practical option, with good traction and an easy finish. Exposed aggregate is attractive and grippy but takes careful timing. A salt finish gives a lightly pitted look. We help you choose based on the slope, the sun exposure and how you use the driveway.

What do you do about tree roots near the driveway?

We look at the species, the root size and whether the tree is on your lot or the city's. Cutting large roots can hurt or kill a tree, so we may adjust the design with a thicker section, root barrier or different joint layout. Trees on public property need the city's okay before any roots are cut.

Ready to talk about concrete driveway installation?

If your driveway has started to crack, tilt or hold water, let San Jose Hardscapes take a look. We'll check the slope, probe the soil, look at what's happening at the apron and tell you honestly whether it needs a full rebuild or something smaller. Then you'll have a clear plan for the slab, the base and the drainage before any concrete goes in.